Adding Publish Locations
A publish location is a location in the advanced integration project that is linked to some destination folder, for the purpose of publishing your Revit project files (RVT) to that linked destination folder. You can add as many publish locations to your project as you need, in case you need to publish to more than one location. For example, you might create one publish location just for PDF publishing, and another publish location just for DWG publishing. Or, you might create one publish location that publishes to a ProjectWise datasource, and another publish location that publishes the same files to ProjectWise Share.
Create a Publish Location Linked to a Folder in a ProjectWise Datasource
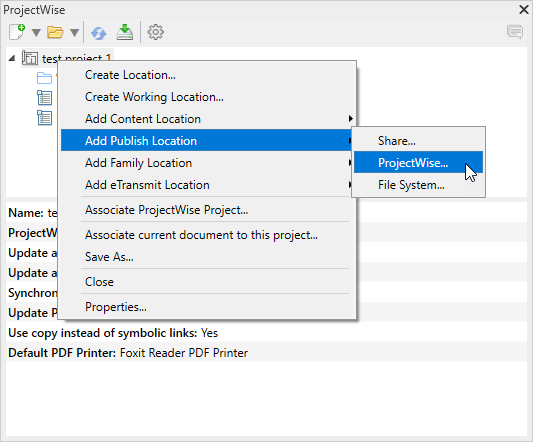
- Right-click your project in the ProjectWise browser and select .
- In the
Select the folder to link dialog,
select a work area or folder (where the published files will be stored) and
click
OK.
Note: The Select the folder to link dialog opens to the current datasource, which is the datasource that your project is stored in. If needed, you can select a folder from another datasource by selecting another datasource from the Folders list and logging in when prompted. Whichever datasource you use, you can either select an existing work area or folder, or you can right-click in the dialog to create a new work area or folder.
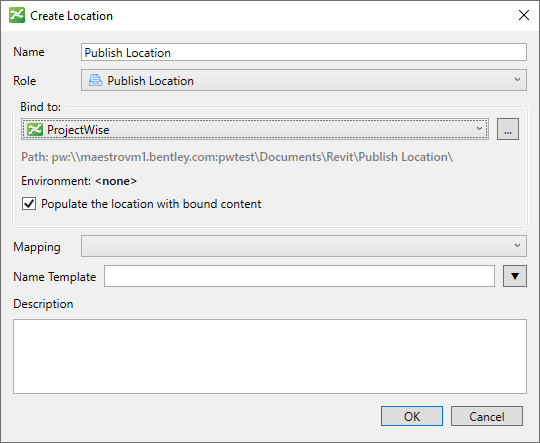
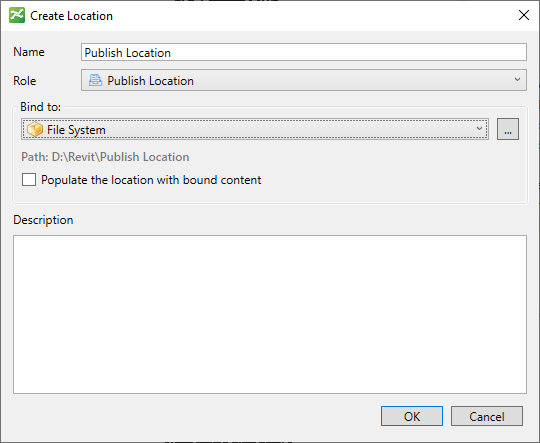
- In the Create Location dialog, click OK.

The publish location is added to the project in the ProjectWise browser. You now can use it to publish your Revit project files. (see Publishing)
Create a Publish Location Linked to a Folder in ProjectWise Share
- Make sure this project is associated to a ProjectWise project. (see Associate a Project to a ProjectWise Project)
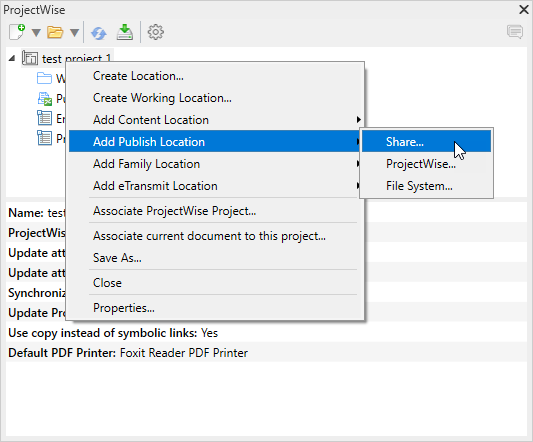
- Next, right-click your project in the ProjectWise browser and select .
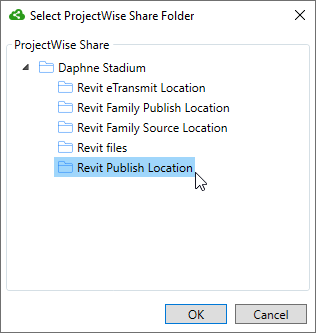
- In the Select ProjectWise Share Folder dialog, expand the top folder (the name of the ProjectWise project), then select a subfolder (where the published files will be stored) and click OK.
- In the Create Location dialog, click OK.

The publish location is added to the project in the ProjectWise browser. You now can use it to publish your Revit project files. (see Publishing)
Create a Publish Location Linked to a Local or Network Folder
- Right-click your project in the ProjectWise browser and select .
- In the Browse For Folder dialog, select a local or network folder (where the published files will be stored) and click OK.
- In the Create Location dialog, click OK.


The publish location is added to the project in the ProjectWise browser. You now can use it to publish your Revit project files. (see Publishing)
Publish Location Settings
| Setting | Description |
|---|---|
| Name | Sets the display name for this location in the ProjectWise browser in Revit. The location name defaults to the name of the selected linked folder, but you can change the location name if needed. |
| Role | Must be set to Publish Location for this type of location. |
| Bind to | The
Bind to menu shows which repository type is
selected (ProjectWise,
Share, or
File System), and the
Path field below it shows the path to the
selected linked folder in that repository. For example:
ProjectWise datasource work area or folder path - pw:\\servername:datasourcename\Documents\Revit Publish Location ProjectWise Share folder path - ProjectWise Share\Home\Revit Publish Location Local or network folder path - C:\Revit Publish Location |
| Environment | (ProjectWise only)
Shows the name of the environment that is assigned to the selected linked work area or folder (if it has no environment, this field displays <none>). |
| Populate the location with bound content | When on (default), a link to each document that currently exists in (or later gets added or published to) the destination folder will be added under this location in the project. |